Turn Neovim Into a Powerful IDE
This article will guide you in making Neovim a powerful IDE and become your primary text editor to increase productivity. This article will guide you to install, set up, and teach basic usage of Neovim.
Why Neovim?
Good question. It has a reasonable answer. I'm not a fanatic fanboy of a software. Let me show you some problems first.
The most favorite text editor might be the VS (Visual Studio) Code. I agree with this. VS Code is awesome, free, and open source. The second one might be premium IDEs from JetBrains. They are good software. But the problem is, that we might open multiple text editors or IDEs and work with them. Let's say you're working with microservices so you open many text editors for each microservice, or working as a full-stack developer you need to open many text editors for back-end and front-end stuff. It will cause your computer heavy. It is not efficient to work that way. So, we need a very lightweight text editor and powerful IDE (Integrated Development Environment).
We need many plugins to make the text editor a powerful IDE. The lightweight text editor will be heavy if it contains a lot of plugins. We also need a text editor with a huge community to provide many plugins and help each other.
So, the problem is with the desktop-based applications. We need to work with terminal. Most servers are using Linux. They have no desktop too, only terminal. If you want to configure servers, you need a terminal-based text editor. Here, we have two favorite terminal-based text editors; Nano and Vi.
Vi / Vim / Neovim Basic Commands
Nano is simple and easy to use. Vi is the opposite. But Vi can be configured to be much powerful and learning Vi is a great investment. So, it is great to learn Vi, especially its commands. Here are the basic commands of Vi.
| Key | Description |
|---|---|
| h | Move left |
| l | Move right |
| j | Move down |
| k | Move up |
| x | Delete or cut |
| c | Copy |
| p | Paste |
| dd | Delete the entire line |
| u | Undo |
| Ctrl / Control + r | Redo |
| r | Replace |
| i | Insert mode |
| v | Visual mode |
| Esc | Escape or back to the normal mode |
| :<number> | Go to the line number |
| :w | Write / save |
| :w! | Overwrite / force save |
| :q | Quit |
| :q! | Force quit |
| :wq! | Overwrite then quit |
| /<word> | Find |
| n | Go to the next found word |
| Shift + n | Go to the previous found word |
| :%s/<a>/<b>/g | Search and replace globally |
There is a key for search and replace globally. There is a key for doing that on multiple files, but a little complicated. Here are the steps:
- Open the Telescope. Here is a key to open the Telescope live grep: space » f » w.
- Open Quickfix List Live Grep by typing Ctrl + Q.
- Search and replace globally on multiple files,
:cdo %s/<a>/<b>/g.
I remember the first time I opened Vi, I didn't know how to quit. Haha. Oh, remember, all those commands only run in the normal mode. Here is another scenario for copy and paste.
- Go to the visual mode
- Move to select characters
y, yank or copy, it will quit the visual mode- Go to the line that you wanted
- Paste
Install Vim if you want to master Vi commands further then run vimtutor.
Because of those commands, people preferred to use Vi and wanted to improve it, then it became Vim (Vi Improved).
Vi has been improved with Vim but that is not enough. People want to improve more. So, to make it extensible, powered by Lua, people made Neovim.
Install Neovim
Visit this page to see the details of Neovim installation. We need to install the latest release, not development or pre-release, or v0.10 as the current release, at this moment (this article written).
Install NvChad
NvChad will make the Neovim to be a powerful IDE. It is just like a group of Neovim plugins. But, there is pre-requisite software that needs to be installed.
Install Nerd Fonts
Nerd Fonts are great fonts for the terminal. Download some fonts. I suggest you install Symbols Nerd Font and Hack Nerd Font.
Install ripgrep
Install ripgrep, it is required for Telescope (Neovim plugin).
Install software to build plugins
Most plugins require to build.
Linux
sudo apt-get install build-essential for the Debian-based. For other distros, make sure you installed gcc and make.
macOS
xcode-select --install
Windows
Install MinGW-w64.
Install LuaRocks
LuaRocks is the package manager for Lua modules. Download it! For Debian-based Linux and macOS, you can follow the instructions below.
Linux
sudo apt-get install luarocks
macOS
brew install luarocks
Install pngpaste
brew install pngpaste for Linux and macOS.
Terminal
In Linux, Neovim works great with the native terminal. In Windows, I think the best one is PowerShell. In macOS, I think you might download iTerm2.
Open iTerm2 Settings. We need to configure it.
- Appearance > Theme > Minimal
- (Optional) Profiles > Colors > Color Presets > Pastel (Dark Background)
- (Optional) Profiles > Text > Font > Hack Nerd Font
- Profiles > Keys > Left / Right Option Key > Esc+
Configure
NvChad is a group of files located in ~/.config/nvim. We will put our config there. One of the problems with the text editor is it is not ready to use. We need to install plugins and configure them. It is a little confusing for newcomers in Neovim with NvChad. Do not be worry. I'm glad to share my config.
My config is ready for development with:
- Front-End Development (tested with React)
- NodeJS with TypeScript. Make sure you installed NodeJS.
- PHP
- Go. Make sure you installed Go.
- Lua
It is also ready for linting with Sonarlint, debugging, and a help from AI.
I think it is minimum enough for modern development. Now, let's install it.
- Go to https://github.com/aristorinjuang/NvChad.
- Fork it.
git clone git@github.com:your-username/your-repository.git ~/.config/nvim && nvim
The Mason will install all the plugins once you opened the Neovim. If that does not happen then run :MasonInstallAll or :Lazy sync.
GOBIN
Make sure that you installed Go correctly. Add an environment variable to your system, GOBIN, export GOBIN="$GOPATH/bin".
Setup AI assistance
AI is a trend now. Some people prefer to have AI assistance in their text editors. Okay, let's get it.
- Go to Anthropic and create an account, https://console.anthropic.com/.
- Create an API key, https://console.anthropic.com/settings/keys.
- Add an environment variable to your system,
ANTHROPIC_API_KEY,export ANTHROPIC_API_KEY="your-api-key".
Check health
Go run :checkhealth to see whether Neovim is ready to go or not. Make sure there are no errors. Try to fix it if you find some errors. We don't need to fix all warnings.
Neovim with NvChad Basic Usage
Congratulations. We just installed and configured Neovim with NvChad. Now, we are ready to go. Go to the project you want to work with then run nvim. Go run :NvCheatsheet to open the NvChad cheatsheet.
Mason
- Run
:Masonto open the Mason. - Press
Enterto see the information about the item. - You will get the homepage. Visit the homepage for more details.
Toggle terminal
Press Alt / Option + h / v / i to toggle a terminal. h for horizontal, v for vertical, and i for floating one.
The commands will exist here for any item we installed from the Mason. Let's say gopls, open the terminal, and run which gopls to check it yourself.
nvim-tree
Ctrl / Control + n to toggle the tree.
| Key | Description |
|---|---|
| j | Move down |
| k | Move top |
| Enter | Toggle folder |
| x | Toggle cut / move |
| c | Toggle copy |
| p | Paste |
| Shift + h | Toggle hidden files |
| Shift + i | Toggle ignored files by Git |
| Ctrl / Control + k | Show file information |
Treesitter
In short, Treesitter is a tool for Neovim to understand the language or syntax.
:TSInstallInfoto see available or installed items.:TSInstall html, an example to installhtml.
Telescope
Telescope help us to find files.
Space + f + fto find files.Space + f + wto grep or find files by the content inside the files.
Jump
Jump to the line or file.
| Key | Description |
|---|---|
| g + d | Go to the definition |
| ] + d | Go to the next diagnostic |
| [ + d | Go to the previous diagnostic |
Tab and Window
| Key | Description |
|---|---|
| space + x | Close the tab |
| Tab | Go to the next tab |
| Shift + Tab | Go to the Prevous tab |
| Ctrl + w | Control window |
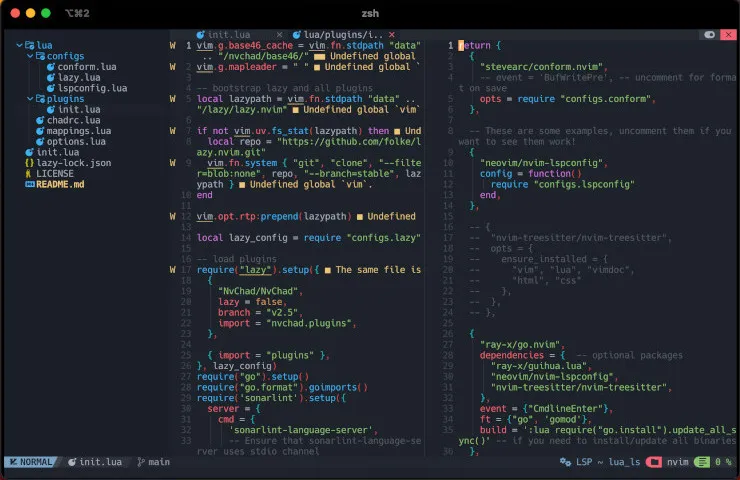
Install and set up plugins
An important part. We also hope that one day you will contribute to Neovim.
- Go to https://dotfyle.com/neovim/plugins/trending to search for the plugins that you need.
cd ~/.config/nvim && nvim.- Add the plugin to the
lua/plugins/init.lua. - Set up the plugin at
init.lua.
Explore others
The next step is to learn it yourself.
- Run
:then pressTab. Plugin commands start by capital. - Press
spacethen pressBackspace / Deleteto see available menus.